
BIAB Overlay Explained
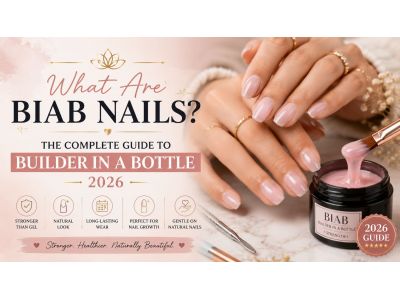
"Builder gel," "BIAB," "overlay" — if you've been researching nail treatments, you've probably seen these terms used almost interchangeably, and it's not always clear what they actually mean in practice. If you've already read our complete guide to BIAB nails, you'll know the basics, but understanding exactly how a BIAB overlay is structured helps explain why it behaves so differently from acrylic or standard gel polish, and why it's become such a popular choice for people wanting stronger natural nails.
This guide breaks down what an overlay actually is, how the layers of a BIAB application work together, why the curing process matters so much, and how all of this translates into the strength, flexibility and wear time BIAB is known for.
What Does "Overlay" Actually Mean?
In nail terminology, an overlay refers to a product applied directly over your own natural nail to add strength, without extending the length using a tip or form. This is different to nail extensions, where a tip is glued on first and the product is built out over that to add length. BIAB is most commonly used as an overlay on the natural nail, though it can also be used over tips if length is wanted.
Advertisement · Scroll to continue
The purpose of an overlay is to reinforce a nail that might otherwise be soft, thin, or prone to breaking, while still keeping a natural shape and thickness. This is part of why BIAB has become so popular with people who want stronger nails without the noticeably artificial look and feel that can come with acrylics.
The Layers of a BIAB Application
A typical BIAB overlay is built up in a series of thin layers rather than applied all in one thick coat. Each layer is cured under UV or LED light before the next is added, which is what allows the final result to be strong without being bulky or heavy on the nail.
A standard BIAB application generally involves:
- Preparation. The natural nail is shaped, cuticles are tidied, and the surface is lightly buffed to help the product adhere properly.
- Primer or dehydrator. A thin layer is applied to remove any natural oils from the nail plate, improving adhesion.
- Base layer. The first thin layer of BIAB gel is applied and cured. This layer forms the foundation of the overlay and bonds directly to the natural nail.
- Building layers. One or two further thin layers are added and cured, building strength and structure, particularly through the stress points of the nail such as the smile line and free edge.
- Shaping. Between layers, the nail is often lightly filed to refine the shape before the final layer is applied.
- Top coat. A final glossy sealing layer is applied and cured, giving BIAB its signature smooth, shiny finish.
Each of these layers is thin by design. Building strength through several thin, fully cured layers rather than one thick layer is what gives BIAB its flexibility, since a single thick layer would be more prone to cracking under pressure.
Why Curing Matters So Much
Each layer of a BIAB overlay needs to be fully cured under UV or LED light before the next layer goes on. If a layer isn't cured properly, whether from too short a curing time or an underpowered lamp, the layers underneath can remain slightly soft, which affects both the strength of the overlay and how well it bonds to subsequent layers.
This is one of the reasons professional application tends to produce a more durable result than at-home kits. Salons generally use properly calibrated, higher-wattage lamps and follow precise curing times for each layer, which ensures the full structure of the overlay cures evenly from the base layer through to the top coat.
Why BIAB Feels Different to Acrylic
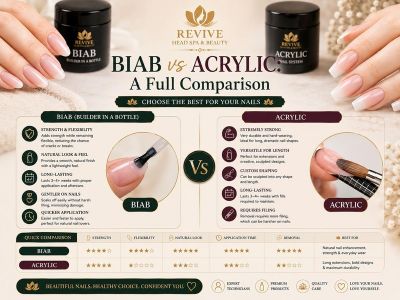
Acrylic is created by mixing a liquid monomer with a powder polymer, which hardens through a chemical reaction rather than curing under a lamp. This produces a very rigid, hard overlay, which is part of why acrylic is often chosen for adding significant length or for extremely active hands, but it also means acrylic doesn't flex much with the natural nail.
BIAB, by contrast, is designed to retain a small amount of flexibility even after fully curing. This flexibility allows the overlay to move slightly with the natural nail as you go about daily tasks, which many clients find far more comfortable than the rigid feel of acrylic. If you're deciding between the two, our comparison guide on BIAB versus acrylic nails looks at this in more detail, including differences in application, removal and long-term nail health.
Advertisement · Scroll to continue
Why BIAB Feels Different to Regular Gel Polish
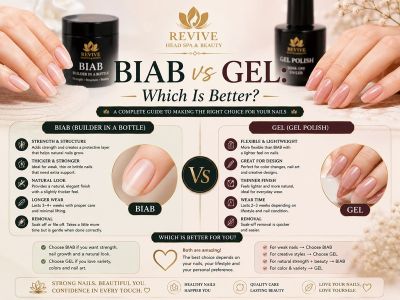
Regular gel polish is a thin, coloured product applied over the natural nail primarily for a glossy, long-lasting colour finish. It offers very little in the way of structural reinforcement, which is why it's not usually recommended for anyone with soft, thin or brittle nails who wants extra strength.
BIAB, on the other hand, is formulated specifically to reinforce and strengthen the natural nail through its layered structure, in addition to offering a glossy finish. This structural difference is the main reason BIAB tends to last significantly longer than standard gel polish before chipping or wear becomes noticeable. Our guide on BIAB versus gel nails covers this comparison in full, including how each holds up over a typical two to three week period.
How the Overlay Structure Affects Aftercare and Removal
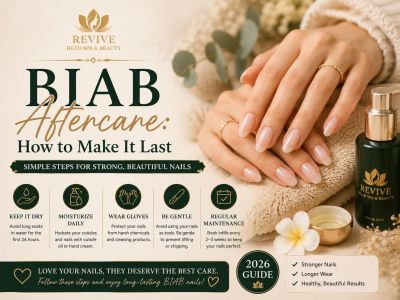
Understanding how the layers are built also explains why aftercare and removal need to be approached carefully. Because each layer bonds tightly to the one below it and to the natural nail itself, picking or peeling BIAB away can pull off several bonded layers at once, along with some of the natural nail underneath. This is why our BIAB aftercare guide emphasises daily cuticle oil and avoiding picking, since these habits protect the integrity of the bond between layers throughout the life of the set.
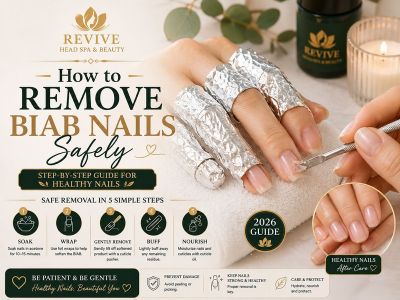
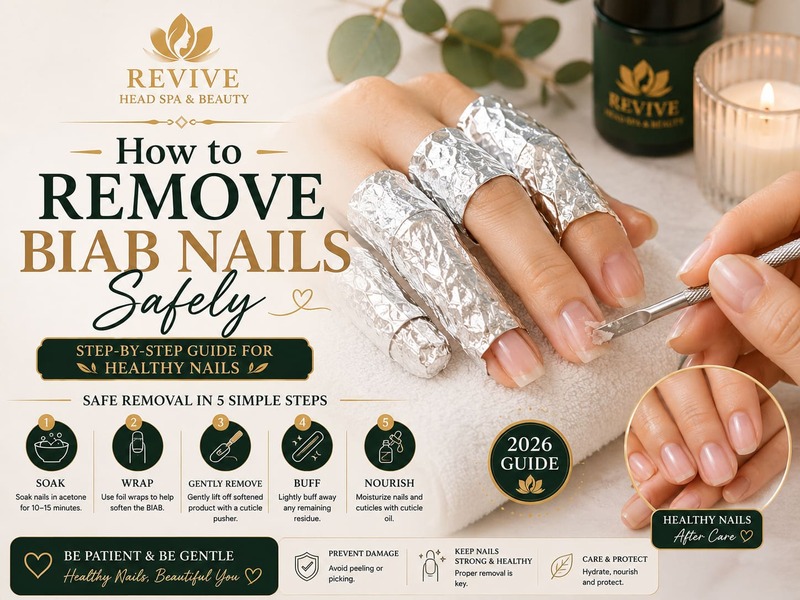
The same layered structure is why removal requires a proper acetone soak-off rather than simply filing the product away. Acetone gradually breaks down the bond between each cured layer, allowing the whole overlay to soften and lift away in one piece rather than needing to be filed off layer by layer, which would be far more damaging to the nail. Our guide on how to remove BIAB nails safely walks through this process step by step.
Does the Overlay Structure Affect Cost?
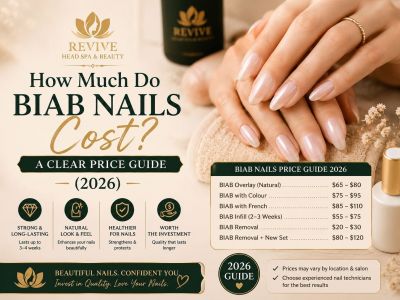
The layered application process, along with the curing time required between each layer, is part of why a well-applied BIAB set generally takes a bit longer in the chair than a quick gel polish change. This is factored into typical pricing across salons. If you're budgeting for a full set, fill or removal, our BIAB nails cost guide outlines what to expect price-wise across different treatments.
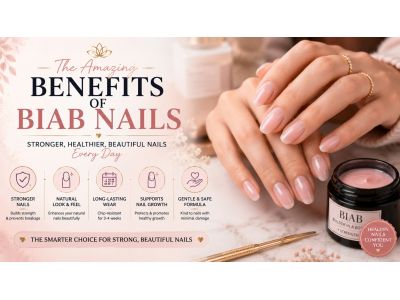
It's also worth weighing the overlay's durability against the price when comparing nail treatments overall. Because BIAB holds up well over three to four weeks with proper care, the cost per week of wear often works out comparably or better than more frequent gel polish changes. For a broader look at why so many people are switching to BIAB, our article on the benefits of BIAB nails covers this alongside the other advantages of the treatment.
Want a Properly Layered BIAB Overlay? Visit Revive – Head Spa & Beauty
If you're in Adelaide and want your BIAB overlay applied with the correct layering and curing technique from the start, Revive – Head Spa & Beauty at 103B Jetty Road, Glenelg SA 5045 offers professional BIAB application alongside their full range of head spa and beauty treatments. A well-built overlay, applied layer by layer with proper curing, is what gives you the strength and flexibility BIAB is known for.
Explore Our ServicesIf you're in Adelaide and would like to see some local options before booking, our roundup of the best places to get BIAB in Adelaide highlights a few trusted salons worth considering alongside Revive.
Frequently Asked Questions
Q: Is a BIAB overlay the same as an extension?
A: Not usually. An overlay is applied directly over the natural nail without adding length via a tip, while an extension uses a tip or form to build out length before the overlay product is applied over the top.
Q: Why is BIAB applied in several thin layers instead of one thick layer?
A: Thin layers cure more thoroughly and evenly under UV or LED light, and building strength through multiple thin layers gives the overlay flexibility, whereas one thick layer would be more prone to cracking.
Advertisement · Scroll to continue
Q: Does an under-cured layer affect how long BIAB lasts?
A: Yes. If a layer isn't fully cured, the overlay can remain slightly soft in places, which affects both its overall strength and how well subsequent layers bond, often leading to earlier lifting or cracking.
Q: Can BIAB be used to add length to my nails?
A: Yes, BIAB can be applied over a tip or nail form to add length, though it's most commonly used as an overlay directly on the natural nail for added strength without extra length.
Q: Why does BIAB feel more flexible than acrylic?
A: BIAB is formulated to retain some flexibility even after curing, allowing it to move slightly with the natural nail, whereas acrylic hardens into a much more rigid overlay.
Final Thoughts
Understanding how a BIAB overlay is actually built, layer by layer, under careful curing, explains a lot about why the treatment behaves the way it does. It's this structure that gives BIAB its balance of strength and flexibility, and it's also why proper application, aftercare and removal all matter so much to getting the best result. A well-applied overlay, cured correctly at every stage, is the foundation of a set that looks great and lasts the full three to four weeks it's capable of.
If you're considering BIAB for the first time or comparing it to other nail treatments, understanding the overlay structure is a useful starting point for knowing what to expect, both in the chair and in the weeks that follow.